Quick Meteor Mobile App Tutorial
December 3, 2014
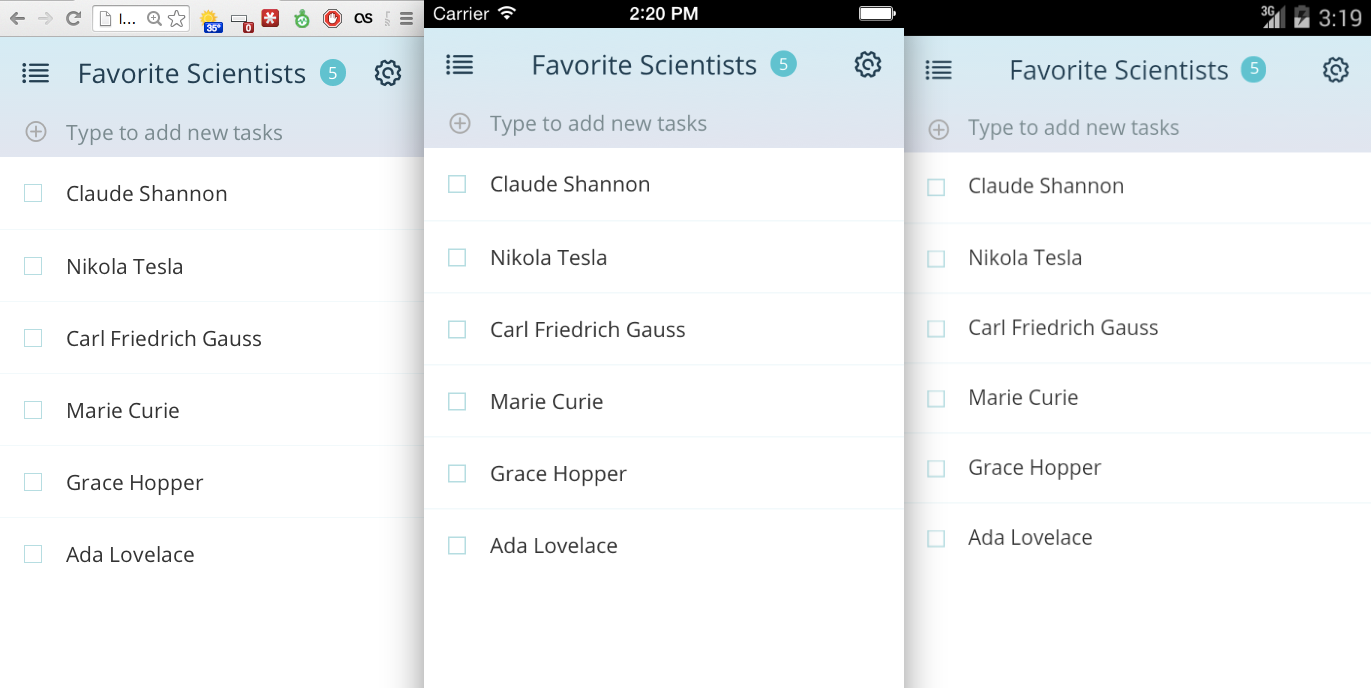
Meteor recently released version 1.0 so I decided to revisit deploying Meteor apps to iOS and Android. The last article showed how to deploy the default Meteor application, but this time I will be deploying the example todo app.
If you don’t have Meteor installed first open a terminal window and run
curl https://install.meteor.com | /bin/sh
If you already have Meteor installed ensure that you are using the latest version by running
Next create a new project using the todo example and change to the new project directory
meteor create --example todos
cd todos
To build an app for iOS first you will need to install the latest version of Xcode.
Then add the package required to build an iOS app
Finally run the app on the iOS simulator
The setup for building Android apps is a bit more involved. First you will need to install the Android SDK by running the command
meteor install-sdk android
This command will walk you through the steps necessary to get your environment setup properly.
Then add the platform by running
meteor add-platform android
Finally you can run the app in the Android Emulator
If you have any questions or feedback please share in the comment!
View Comments
How to Get Started Building Mobile Apps With Meteor
August 22, 2014
[Newer Version] Quick Meteor Mobile App Tutorial
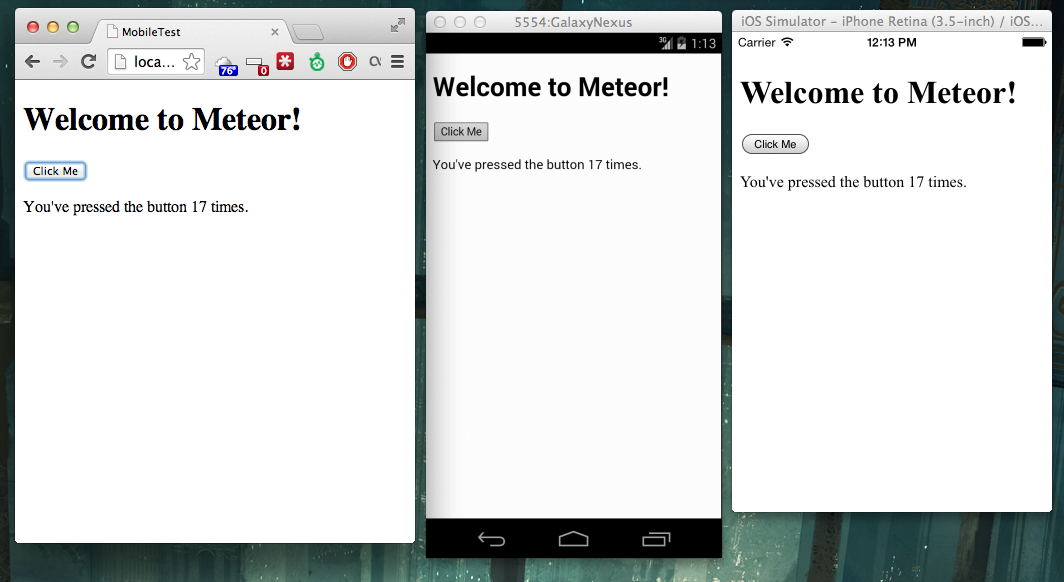
Meteor recently announced the ability to create mobile apps for iOS and Android using Cordova. This short guide will show you how to get up and running quickly.
To build an app for iOS first you will need to install the latest version of Xcode.
If you want to build an app for Android you will need to install the Android SDK. The Android Environment will be installed by Meteor during the build process so there is no need to manually set it up.
If you don’t have Meteor installed first open a terminal window and run
curl https://install.meteor.com | /bin/sh
Create a project called MobileTest in the current directory
meteor create MobileTest
cd MobileTest
Upgrade the Meteor project to use the Cordova Preview build
meteor update --release CORDOVA-PREVIEW@3
Then add the package required to build an iOS app
Finally run the app on the iOS simulator
To build the app for Android you will first need to install the Android Platform (which is currently about 322MB)
meteor add-platform android
Then you can run the app in the Android Emulator
If you have any questions or feedback please share in the comment!
View Comments
Mapping and Geocoding in Commercial Web Applications
March 14, 2014
Mapping and geocoding is difficult to do in commercial web applications. Not technically difficult, but in terms of licensing. Many websites and applications use Google Maps, but if your app is not free or a native application commercial licensing fees are involved and they are hidden behind the wall of “if you have to ask you can’t afford it.” Other popular services such as Yahoo and Bing have the same problem. If you are a small company that has a web application you want to charge for your options become extremely limited.
The project I’m working on is a Rails application. After researching and testing I decided to go with the Geocoder gem for geocoding and Leaflet for creating the interactive maps. I chose these libraries because they support multiple services, allowing us to easily switch between or use multiple services side by side, and they are extremely easy to use. After picking the libraries I decided to keep my search limited to the services they support (Geocoder Supported Services, Leaflet Supported Services). I also excluded any services that didn’t have transparent pricing and terms.
The first service I tested was CloudMade. They provide affordable geocoding and mapping with worldwide coverage. Unfortunately their services fell short for me. Their geocoding service often returns coordinates in the wrong country and the documentation for their non-beta v2 Api (.pdf) seems incomplete. Cloudmade’s Geocoding v3 beta service had fewer issues and better documentation, but isn’t currently supported by the Geocoder gem.
Next I tried OpenStreetMap’s Nominatim geocoding service. Nominatim is free to use according to the Nominatim usage policy, but they also instruct users to limit their usage to no more than one request per second. If you need higher usage they point users to MapQuest.
MapQuest provides a Community Edition (Open Data) that provides geocoding with OpenStreetMap data for free with no rate limit. In testing MapQuest geocoding seemed promising, but attempting to geocode user entered addresses had a success rate of only about 60%, even after ruling out mistyped or invalid addresses.
I went into this looking for a service that would work worldwide, but at this point I decided to narrow my search to US only providers for two reasons, the project I’m working on currently only requires US coverage and the Geocoder gem supports multiple services so as we move into new areas we can select the best provider for each region.
The first US only geocoding service I tested, Geocodio, hit it out of the park. They have transparent pricing and they return coordinates for even the most rural addresses. On the small sample of addresses I tested Geocodio seems to be on par with what I get from querying Google. The only downside I’ve encountered so far is that Geocodio occasionally return coordinates for fake addresses in what I assume is an attempt to approximate a location. Accuracy is something I will be continually testing, but so far Geocodio seems like a good fit.
For the mapping component I decided to go directly with OpenStreetMap. The OpenStreetMap terms are extremely permissive, they are worldwide, their map tiles look nice, and as far as I can tell they are one of the few (if only) free mapping services that allow SSL, which is important if you are securing your web apps with SSL (like you should).
I was able to get our mapping and geocoding features off the ground using a combination of OpenStreetMap, Geocodio, the Geocoder gem, and Leaflet. As we expand into new areas we will continue to test new services for accuracy as well as licensing terms that are a good fit for commercial web applications.
If you have any experience implementing mapping and geocoding in a commercial web app, or if you have experience with other geocoding or mapping services I would like to hear from you in the comments!
View Comments
Simple AngularJS Forms
January 13, 2014
Reactive programming and templating are extremely powerful because they allow you to define how your UI should work, without the need to manually manipulate the UI.
Here is an extremely simple example of a form that should calculate and display an area to the user, based on the length and width.
<form id="area-form">
    <input id="length" type="number" step="any" placeholder="Length" value="9" />
    <input id="width" type="number" step="any" placeholder="Width" value="25.75" />
    <input id="area" type="number" step="any" placeholder="Area" readonly="readonly" />
</form>
Before discovering reactive programming, this is how I would code the dynamic behavior of the form.
jQuery ->
 $('#length, #width').bind 'change keyup', ->
   $('#area').val(parseFloat($('#length').val()) * parseFloat($('#width').val()))
 .change()
JSFiddle Simple jQuery Form
This worked well for simple forms, but it always felt WRONG. As the complexity of calculations increased the debugging complexity increased exponentially.
I experimented with various frameworks that included reactive programming and templating functionality such as AngularJS, Ember.js, Meteor, as well as many others. Having the UI automatically update as the underlying values change felt like magic, but I still wanted to handle everything else server side. Fortunately I found a way to use only the reactive and templating features of AngularJS.
Here is the same example rewritten using AngularJS
<form id="area-form" ng-controller="Template as template">
    <input id="length" type="number" step="any" placeholder="Length" ng-model="template.length" />
    <input id="width" type="number" step="any" placeholder="Width" ng-model="template.width" />
    <input id="area" type="number" step="any" placeholder="Area" readonly="readonly" value="{{template.getArea()}}" />
</form>
class Template
  constructor: (@$scope) ->
    @length = 9
    @width = 25.75
  getLength: -> parseFloat(@length)
  getWidth: -> parseFloat(@width)
  getArea: -> @getLength() * @getWidth()

Template.$inject = ["$scope"];
app = angular.module 'templateApp', []
app.controller 'Template', Template
angular.bootstrap document.getElementById('area-form'), ['templateApp']
JSFiddle Simple AngularJS Form
This might seem like overkill for such a simple form, but I find it to be much cleaner and more readable. As the forms and calculations grow in size and complexity that becomes much more important.
View Comments
Javascript Regex Pitfall
September 20, 2013
I’ve run into a frustrating issue with several of my apps where a regular expression I’m using seems to periodically fail.
It turns out the issue has to do with enabling global search on the regular expression in conjunction with multiple calls to the test method. Every time the test method is called on a regular expression with global search it updates an internal index which points at the last match. Each subsequent call begins the test starting with the character proceeding the previous match. If there is no match after the previous match then the test returns false and the index is reset.
In the case where there is only one match in the string the test method will fail every other time. In the case of two more matches, calls to test will return true once for every match, then return false.
Here is some example code that illustrates this behavior http://jsfiddle.net/abstractcoder/gx5yh/
Code
var output = "";

var test = "a";
var regex = new RegExp(test, "gi");
for (var i=0; i < 10; i++) {
    output += regex + ".test('" + test + "') is " + regex.test(test) + "\n";
}
output += "\n";

test = "aaa";
for (var i=0; i < 10; i++) {
    output += regex + ".test('" + test + "') is " + regex.test(test) + "\n";
}
output += "\n";

test = "a";
var regex = new RegExp(test, "i");

for (var i=0; i < 10; i++) {
    output += regex + ".test('" + test + "') is " + regex.test(test) + "\n";
}
console.log(output);
Output
/a/gi.test('a') is true
/a/gi.test('a') is false
/a/gi.test('a') is true
/a/gi.test('a') is false
/a/gi.test('a') is true
/a/gi.test('a') is false
/a/gi.test('a') is true
/a/gi.test('a') is false
/a/gi.test('a') is true
/a/gi.test('a') is false

/a/gi.test('aaa') is true
/a/gi.test('aaa') is true
/a/gi.test('aaa') is true
/a/gi.test('aaa') is false
/a/gi.test('aaa') is true
/a/gi.test('aaa') is true
/a/gi.test('aaa') is true
/a/gi.test('aaa') is false
/a/gi.test('aaa') is true
/a/gi.test('aaa') is true

/a/i.test('a') is true
/a/i.test('a') is true
/a/i.test('a') is true
/a/i.test('a') is true
/a/i.test('a') is true
/a/i.test('a') is true
/a/i.test('a') is true
/a/i.test('a') is true
/a/i.test('a') is true
/a/i.test('a') is true
The solution is to simply not specify global search when using a RegExp in conjunction with multiple calls to the test method.
View Comments
Using Multiple Gemfiles
August 23, 2013
One of the major benefits of Bundler is being able to checkout a project and install its Gem dependencies using the bundle command. However, Gems that are only used locally shouldn’t be added to the Gemfile because they unnecessarily alter Gem dependencies and in some cases create conflicts with project Gems.
I wanted users to be able to easily install my project’s toolchain without creating conflicts so I decided to create a separate Gemfile named Gemfile.tools.
source 'https://rubygems.org'

gem 'chef'
gem 'vagrant', '~>1.0.7'
gem 'knife-solo'
To install the Gems from this file you need to run
bundle install --gemfile Gemfile.tools
This will install the Gems and create a new file called Gemfile.tools.lock.
Finally to use the bundle exec command with the new Gemfile.tools you run
BUNDLE_GEMFILE=Gemfile.tools bundle exec ...
I find this to be a bit cumbersome so the other option is to install the Gems with binstubs
bundle install --gemfile Gemfile.tools --binstubs
Then you can access your gems through your project’s bin directory
By creating two separate Gemfiles I was able to harness the power of Bundler while keeping my project and toolchain Gems separate.
View Comments
Create a Windows Service with Ruby - Part 2
August 2, 2013
In the last post I created a simple Windows Service using Ruby. The biggest drawback of creating a Windows Service with Ruby is that the target machine would need Ruby installed as a prerequisite. Fortunately there is a Ruby gem called OCRA which alleviates this issue.
According to OCRA’s GitHub page,
OCRA (One-Click Ruby Application) builds Windows executables from Ruby source code. The executable is a self-extracting, self-running executable that contains the Ruby interpreter, your source code and any additionally needed ruby libraries or DLL.
There are a few changes that will need to be made in order to get the Windows Service working with OCRA.
register.rb
require 'rubygems'
require 'win32/service'
include Win32

unless defined?(Ocra)
  Service.create({
    service_name: 'testservice',
    host: nil,
    service_type: Service::WIN32_OWN_PROCESS,
    description: 'Test Service',
    start_type: Service::AUTO_START,
    error_control: Service::ERROR_NORMAL,
    binary_path_name: "#{`echo %cd%`.chomp}\\service.exe",
    load_order_group: 'Network',
    dependencies: nil,
    display_name: 'Test Service'
  })

  Service.start("testservice")
end
Two changes were made to register.rb. The first change was to wrap the Service.create and Service.start calls in an ‘unless’ block which checks if OCRA is defined in the current environment. This is necessary because OCRA executes the script it is packaging in order to determine dependencies, and we don’t want the bundling process to create and start the Windows Service.
The second change was to point the Windows Service at the service executable we will be creating. We no longer need to have Ruby execute the script because the Ruby runtime will be packaged with the executable.
service.rb
require 'rubygems'
require 'win32/daemon'
include Win32

class TestDaemon < Daemon
  def service_main
      log 'started'
      while running?
        log 'running'
        sleep 10
      end
  end

  def service_stop
    log 'ended'
    exit!
  end

  def log(text)
    File.open(File.expand_path("../log.txt", ENV["OCRA_EXECUTABLE"] || __FILE__) , 'a') { |f| f.puts "#{Time.now}: #{text}" }
  end
end

TestDaemon.mainloop unless defined?(Ocra)
Two changes were also made to service.rb. The first change was to only run the daemon if the script was not being packaged by OCRA. This may be unnecessary because running the mainloop function manually doesn’t seem to do anything if the script isn’t being run as a Windows Service.
The second change was the result of a lot of frustration and head scratching. After packaging the service with OCRA none of the conventional ways of getting the current directory were returning the executable’s parent directory. I believe the cause of this issue is that when a Windows Service is run the current working directory is set to C:\Windows\System32 (or the equivalent on 64 bit systems).
OCRA does have a command line option –ch-dir, that is supposed to change the working directory to the current directory at run time, but this doesn’t seem to work in the context of a Windows Service.
Fortunately OCRA provides another solution. According to the OCRA GitHub readme,
bq. When the application is running, the OCRA_EXECUTABLE environment variable points to the .exe (with full path).
So to solve this issue I simply use the OCRA_EXECUTABLE environment variable if its available, and if not I fall back to the current source directory. The fallback isn’t strictly necessary unless you wish to run the script directly using Ruby, as opposed to running the executable generated by OCRA.
require 'rubygems'
require 'win32/service'
include Win32

unless defined?(Ocra)
  SERVICE = 'testservice'
  begin
    Service.stop(SERVICE) if Service.status(SERVICE).controls_accepted.include? "stop"
  rescue
  end
  Service.delete(SERVICE)
end
The only change to unregister.rb was to wrap it in the OCRA ‘unless’ block to prevent execution on packaging.
Now that the script changes are made the final step is to install OCRA and package the scripts.
gem install ocra

ocra register.rb
ocra service.rb
ocra unregister.rb
These commands will generate the executables register.exe, service.exe, and unregister.exe. Now if you run register.exe, with admin privileges, it will create a Windows Service that runs the service.exe application in the same directory.
I created a GitHub project with the example code as well as the generated executables.
After working out the kinks I was able to create a Windows Service for a production application using Ruby. The simplicity of Ruby paired with the amazing wealth of third party gems makes developing Windows Services with Ruby a very attractive option.
View Comments
Create a Windows Service with Ruby - Part 1
July 18, 2013
Recently I was tasked to create an application that needed to run in the background on a Windows machine, which seemed like the perfect job for a Windows Service. I’ve created Windows Services with .Net before but I wanted to try to create one with Ruby. It turns out that it was pretty easy to get a Windows Service up and running using Ruby.
The first step is to install Ruby on your Windows machine. I recommend the Ruby Installer For my project I installed Ruby 1.9.3-p448, and chose to add Ruby to my PATH during installation.
The next step is to install the win32-service gem from the Win32Utils project The gems in this project expose the Windows APIs in Ruby.
gem install win32-service
Next I created a script that is responsible for registering a new Windows Service.
register.rb
require 'rubygems'
require 'win32/service'
include Win32

Service.create({
  service_name: 'testservice',
  host: nil,
  service_type: Service::WIN32_OWN_PROCESS,
  description: 'Test Service',
  start_type: Service::AUTO_START,
  error_control: Service::ERROR_NORMAL,
  binary_path_name: "#{`where ruby`.chomp} -C #{`echo %cd%`.chomp} service.rb",
  load_order_group: 'Network',
  dependencies: nil,
  display_name: 'Test Service'
})

Service.start("testservice")
This code creates a Windows Service named ‘testservice’ that runs a script named service.rb in the current directory. The service is set to run under the Network Service user and it is also set to auto start if the machine is restarted. This means that the service will run on startup without the need for a user to be logged in. Since this script creates a service under the Network Service user you will need to run this script with admin privileges. For more information read the Win32 Service documentation
The following line is responsible for setting up the service to run your script with Ruby.
binary_path_name: "#{`where ruby`.chomp} -C #{`echo %cd%`.chomp} service.rb",
where ruby uses the Windows command line application ‘where’ to get the location of Ruby if its in your PATH. echo %cd% returns the path to the current directory. The chomp method simply removes any leading or trailing whitespace.
The -C option specifies that Ruby should set the working directory of the script to the directory where the script is located. This allows you to easily access other files in the directory.
The last line actually starts the service. This can also be accomplished by running the following command:
Next I created the script that the Windows Service will actually run.
service.rb
require 'rubygems'
require 'win32/daemon'
include Win32

class TestDaemon < Daemon
  def service_main
      log 'started'
      while running?
        log 'running'
        sleep 10
      end
  end

  def service_stop
    log 'ended'
    exit!
  end

  def log(text)
    File.open('log.txt', 'a') { |f| f.puts "#{Time.now}: #{text}" }
  end
end

TestDaemon.mainloop
This script simply writes to a file named log.txt, which is in the same directory as service.rb. For more information read the Win32 Daemon documentation
Finally, I wrote a script that stops the service if its running, and also deletes it.
unregister.rb
require 'rubygems'
require 'win32/service'
include Win32

SERVICE = 'testservice'

begin
  Service.stop(SERVICE) if Service.status(SERVICE).controls_accepted.include? "stop"
rescue
end

Service.delete(SERVICE)
In Part 2 I will discuss how I used the ocra gem to bundle the Ruby scripts into executables so they can be run on machines that don’t have Ruby installed.
Update 7/23/2013
It seems that the Windows API doesn’t like to receive an empty array for the service dependencies so I updated the code to pass nil instead.
I have also run into an issue where the line
if Service.stop(SERVICE) if Service.status(SERVICE).controls_accepted.include? "stop"
seems to work in Windows 7, but not in Windows 8.1. I recommend stopping the service with
before running unregister.rb.
Finally, I created a GitHub repository for the example code.
View Comments
Using Bower With Middleman Through Sprockets
July 12, 2013
Bower is a simple package management system for js/css similar to Bundler for Ruby or NPM for Node.
Middleman is a static website generator I use to create web app prototypes. Since it uses Ruby, Bundler, and Sprockets its fairly easy to migrate work done in Middleman to Ruby on Rails.
Normally I use Bundler to integrate with common js/css libraries such as jQuery or Bootstrap, but I also like to experiment with new js/css libraries, most of which aren’t bundled as Ruby Gems.
To get Bower to play nice with Middleman first you need to install your Bower packages in the root of your project. This will create a folder named bower_components. This folder won’t be in the Sprockets default search path, but it can be added by inserting the following line into config.rb
sprockets.append_path File.join "#{root}", "bower_components"
Now that Sprockets is set to search the bower_components directory you can use Sprockets to include the files using the following format
//= require component_folder/component_file.extension
Thanks to Headcannon for the Middleman Bower Template which pointed me in the right direction.
View Comments
